On Christmas day, many years ago, I tried my hand at baking for the first time. It was the early 90’s and the Easy Bake Oven was in its heyday. That morning I unwrapped this shiny hunk of plastic, with enough hot pink detailing and well-placed stickers to convince any kid that this was the real deal. From that day on, I was hooked.
My mom loves to tell me how I went on a relentless tear whipping up brownies as dense as hockey pucks, and vanilla cakes that could last years without spoiling. I was so immensely proud of my light-bulb “baked” creations that neither she nor my dad were going to burst my bubble. At least not then, anyways.
Thankfully, these days I’m all about holiday treats that are actually edible. And naturally, this brings me to the topic of gingerbread houses. So often g-bread houses consist of stacks of inedible cookies and rock solid icing - which when combined have at least a 70% chance of chipping a tooth upon contact. Not my cup of tea. Gingerbread houses made of CAKE on the other hand? Now we’re talking.
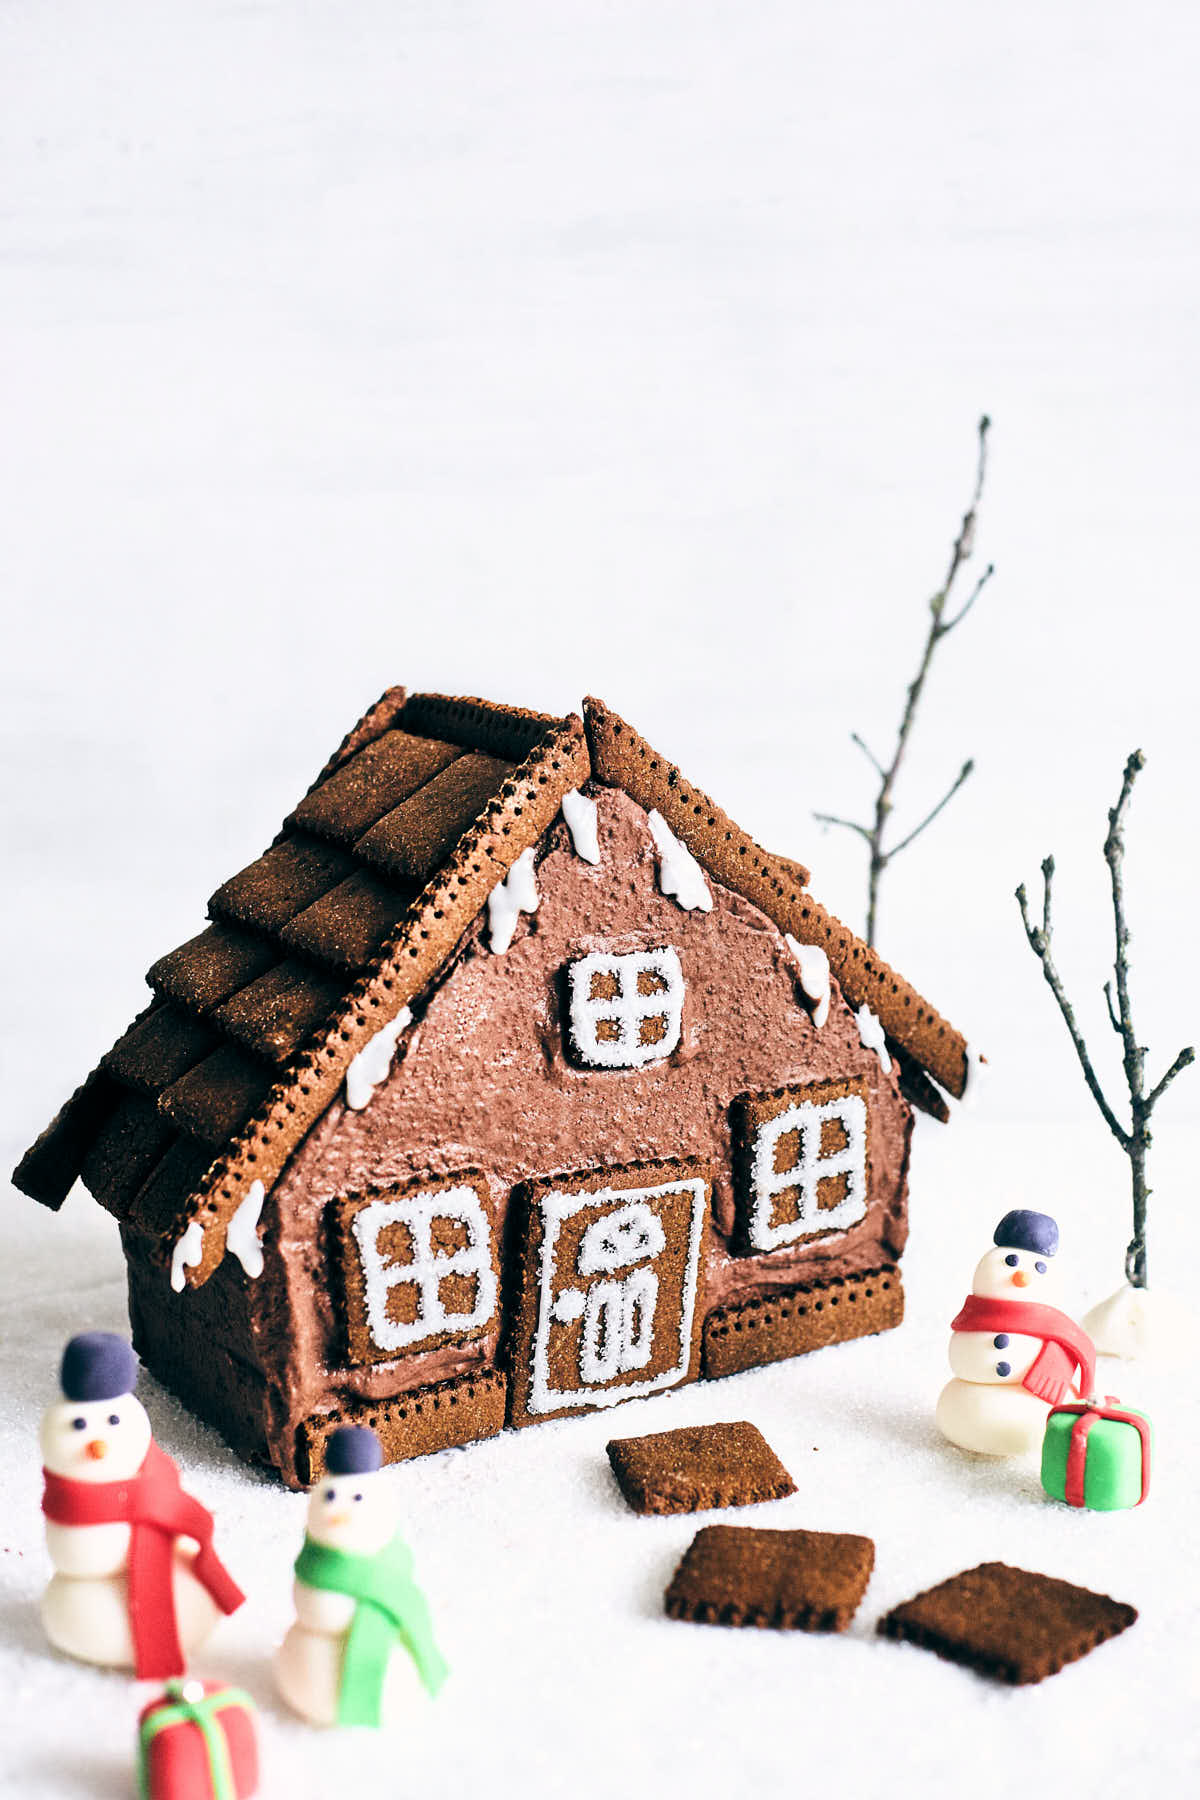
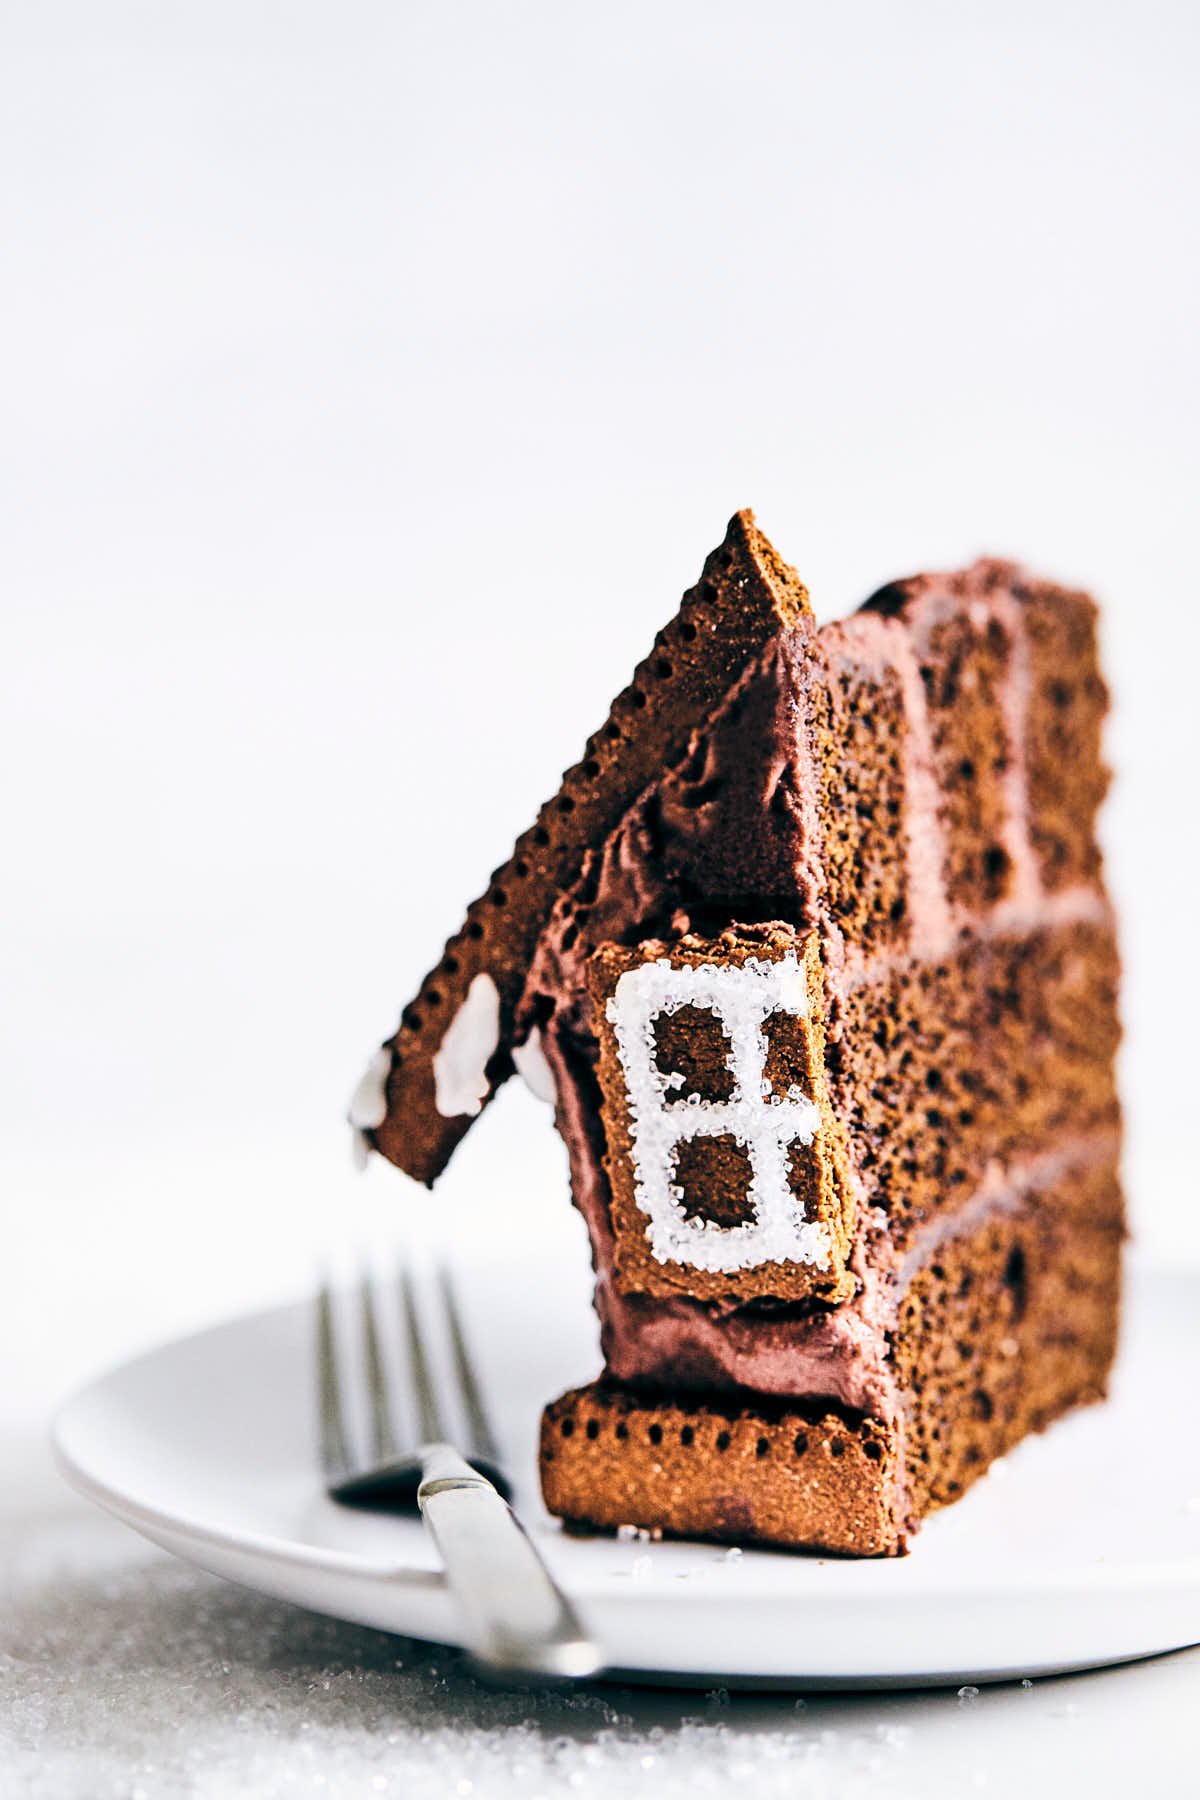
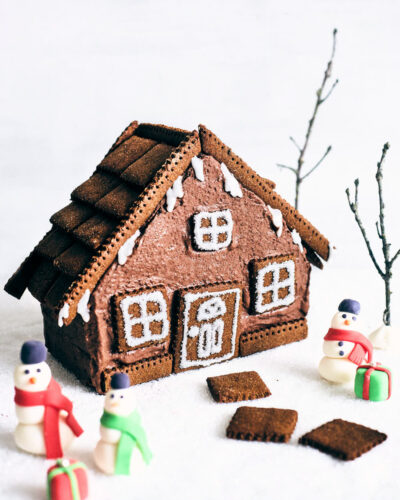
I first made a version of this cake about 10 years ago, when I spotted the idea in (what I think) was a Martha Stewart magazine. I’m sure it contained pounds of butter and white flour...but the idea, it was genius. My variation features three mouthwatering components: moist and decadent gingerbread cake, fluffy chocolate buttercream icing and spiced gingerbread cookies. All three are completely vegan, with no refined flour or added refined sugar (but you’d never guess it!). In the spirit of full transparency, this recipe is no walk in the park. I mean, you’re building a house out of cake...but if you’re up for it, the end result is an entirely edible showstopper.
There’s A LOT to say about this cake, but it’s the holidays and I know you don’t have time to be dawdling. Let's quickly talk about the vegan chocolate “buttercream” though, because it deserves the airtime. I wanted to create a decadent frosting that didn’t rely on vegan butter. Because that stuff scares me. So instead this chocolate frosting starts as a modification to coconut whipped cream. I then took it one step further to get a fluffier and less dense frosting. The trick? Aquafaba. If you still haven’t heard of aquafaba, know that it’s the liquid in a can of chickpeas. It can be used as a substitute for egg whites in baking, and can be whipped to stiff peaks (seriously). The trick to a fast whipping aquafaba is to reduce it over the stove first. This allows some of the excess water to evaporate - and cuts big time off the beating process. Once combined, the “bean-y” taste entirely disappears (yes, actually) and you’re left with a bowl of the soft and fluffy chocolate vegan frosting.
For those of you that are embarking on this holiday cake adventure, know that the recipes below are extensive to help illustrate every step of the way. Anguel even made a GIF to show how the cake gets assembled. If you have any questions, please feel free to leave it in the comments. Happy holiday baking my friends!
📖 Recipe
Gingerbread Cake House
Ingredients
Gingerbread Cake
- 1¼ cup non-dairy milk (unflavored and unsweetened, at room temperature)
- ½ cup melted coconut oil (see note 1)
- 1¼ cup blackstrap molasses (see note 1)
- ⅓ cup applesauce (unsweetened, at room temperature)
- 1 cup coconut sugar
- 1 tablespoon ground flax seeds
- 2 tablespoon cinnamon
- 1 tablespoon ground ginger
- ¾ teaspoon nutmeg
- ½ teaspoon ground cloves
- 1 tablespoon baking powder
- 1 teaspoon baking soda
- 1 teaspoon fine sea salt
- 4 cups spelt flour
Vegan Gingerbread Cookies
- 1 tablespoon ground flax seeds
- 3 tablespoons water
- ¼ cup melted coconut oil
- ¼ cup blackstrap molasses
- ⅓ cup coconut sugar
- 1½ teaspoon cinnamon
- 1 teaspoon ground ginger
- ¾ teaspoon nutmeg
- ½ teaspoon ground cloves
- ½ teaspoon baking soda
- ¼ teaspoon baking powder
- ¼ teaspoon fine sea salt
- 1⅔ cup spelt flour
Vegan Chocolate Buttercream
- 1 cup aquafaba (liquid drained from can of chickpeas)
- 7 oz semi-sweet chocolate, roughly chopped
- 2 (14 fl oz/398 ml) cans full-fat coconut milk (refrigerated overnight or ideally 24 hours, see note 2)
- 1 teaspoon vanilla extract
Instructions
Gingerbread Cake
- Preheat: Preheat oven to 350°F (177°C). Grease and flour 2 (8 x 8-inch) square baking pans.
- Mix batter: In a large bowl, add non-dairy milk, coconut oil, molasses, applesauce, coconut sugar, ground flax, cinnamon, ginger, nutmeg, cloves, baking powder, baking soda, and salt (see note 3). Use an electric mixer to mix until well combined. Add flour and mix until the last streak of flour is incorporated (don't overmix). Divide the batter into the prepared pans.
- Bake cakes: Bake cases until a toothpick comes out clean from the middle of the cake, 30 to 35 minutes. Let cool for 30 minutes in the pan, then transfer to a cooling rack to cool completely. If making cakes in advance, wrap in plastic and store at room temperature for up to 1 day (or, wrap plastic with another layer of tinfoil, then transfer to a freezer bag and freeze for up to 1 month).
Vegan Gingerbread Cookies
- Mix dough: Add flax and water to a large bowl. Use an electric mixer to mix until well combined. Add coconut oil, molasses, coconut sugar, cinnamon, ginger, nutmeg, cloves, baking soda, baking powder, and salt. Mix until well combined. Add flour and mix until the last streak of flour is incorporated. (If the mixer is having trouble mixing in the flour, use a wooden spoon).
- Chill dough: Wrap dough tightly with plastic and put in the fridge for 20 minutes. Once dough is chilled, use a lightly floured surface to roll dough slightly thicker than ⅛-inch. Set out a knife, scalloped pastry wheel and toothpicks.
- Preheat oven: Put the racks in the upper- and lower-thirds of the oven; preheat to 350°F (177°C).
- Cut out cookies: Roll the dough out on a lightly floured surface, until it is just barely thicker than ⅛-inch. Use a scalloped pastry wheel and/or knife to cut: 25 (1½ x 1½-inch) squares, 1 (2 x 3-inch) rectangle, 2 (¼ x 3-inch) rectangles, 1 (¼ x 4½-inch) rectangle, and 4 (¼ x 6½-inch) rectangles (see note 4).
- Bake cookies: Carefully arrange the cookies on 2 parchment lined baking sheets. Bake until golden brown, about 12 minutes, rotating sheets half way. Let cool completely on the baking sheets. Cookies can be made 1 day in advance, and stored in an airtight container at room temperature.
Vegan Chocolate Buttercream
- Reduce aquafaba: Add aquafaba to a small saucepan over medium-low heat. Simmer until it’s reduced to ½ cup of liquid. Transfer to a medium bowl to cool.
- Melt chocolate: Add chocolate to a small bowl. Microwave the chocolate in 20 second intervals, stirring in between, until melted (or alternatively, use a double boiler). Let the chocolate cool so it is no longer hot (but is just warm enough to be in liquid state).
- Whip aquafaba: Use an electric mixer to whip the cooled aquafaba on high speed, until it resembles whipped egg whites, 1 to 2 minutes.
- Whip coconut cream: Scoop out coconut cream into a large bowl. Use an electric mixer to whip the coconut cream until fluffy. Drizzle in melted (cooled) chocolate and vanilla. Whip until thick and fluffy. Add aquafaba and beat until fully incorporated.
- Use or refrigerate: The consistency of the buttercream will vary by the temperature in your kitchen. If it’s on the soft side or if not using right away, cover bowl with plastic wrap and set aside in the fridge. Once chilled, buttercream will stiffen and will need to soften up on the counter slightly (and potentially need to be re-whipped) before spreading on the cake.
Assembly
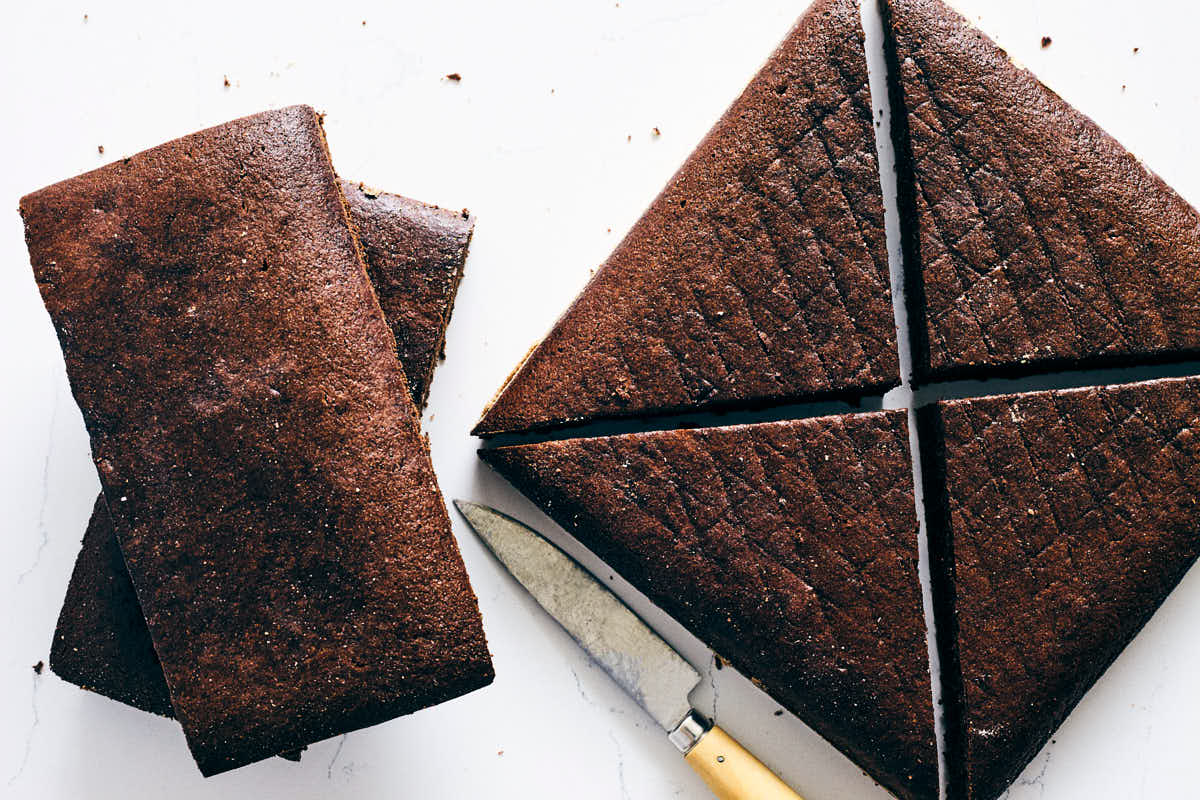
- Cut cakes: Cut 1 cake in half to form 2 rectangles. Cut the remaining cake on the diagonals to form 4 even triangles (from 1 cake).
- Assemble base: Place 1 of the rectangles on a flat work surface. Spread a layer of buttercream on top, then stack with the remaining rectangle. Spread a layer of buttercream on top.
- Make roof: Add 1 triangle at a time on top of the rectangle base, spreading buttercream between each layer to adhere them. You will need to use 3 out of 4 of the triangles to form the roof (the 4th is extra, for snacking).
- Frost the outside: Use the remaining buttercream to frost the outside of the cake (all sides and the full roof). Make sure the buttercream is a thick consistency, and if starts to warm, place the icing in the fridge to harden (you can also place the frosted cake in fridge before adding gingerbread pieces).
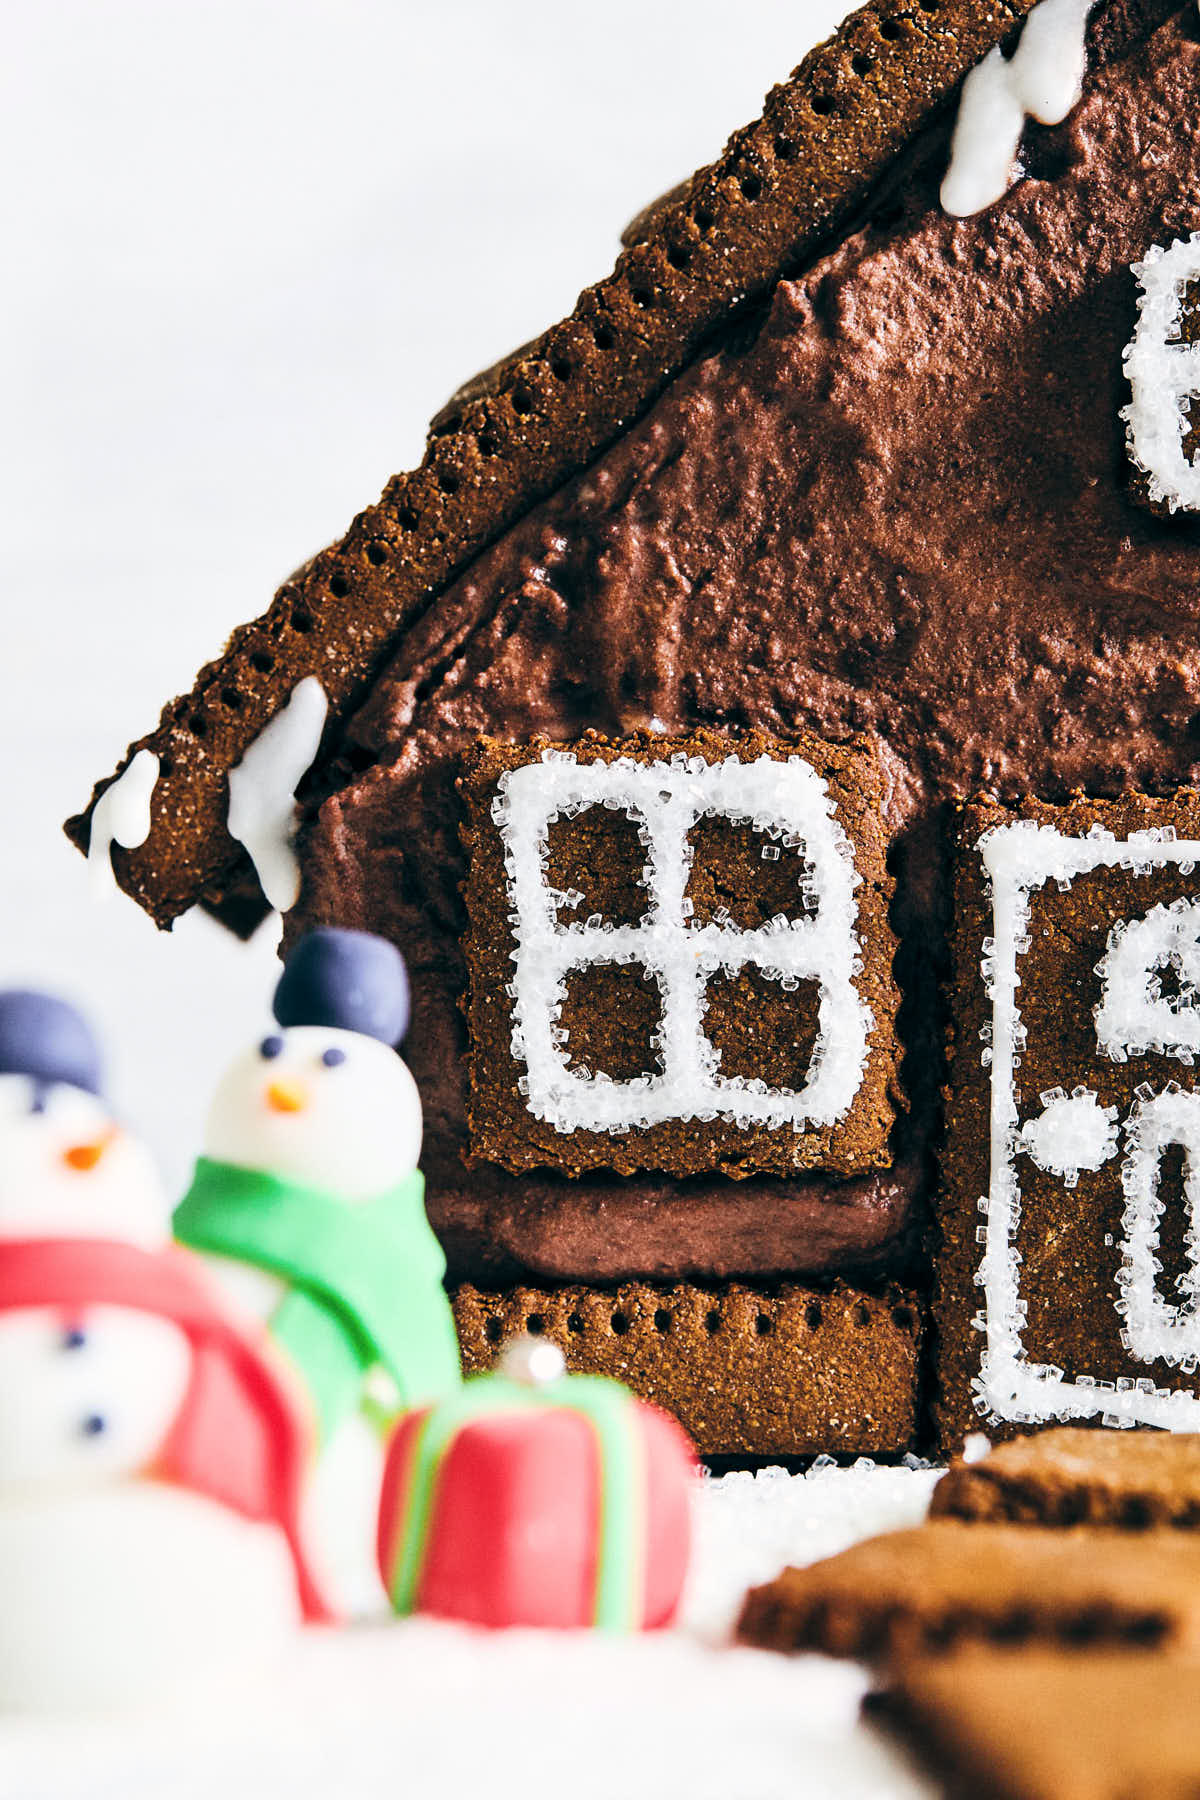
- Decorate: Decorate the gingerbread cookies, if desired. Press the gingerbread windows, doors, trim into the buttercream to adhere. For the roof, start with the bottom layer of "shingles", pressing them down one at a time. Overlap the "shingles" as you work up to the top of the roof. Add any remaining decorations. The cookies will soften on the cake (a good thing!) so aim to assemble at least 1 hour before serving. Extras keep at room temperature for 2 days.
Notes
- Technique tip: Measure the melted coconut oil in a liquids measuring cup, before measuring the molasses. The residual oil in the measuring cup will help the molasses come out easier.
- Coconut milk: For this recipe, we're looking for the coconut solids that separate from the liquids when refrigerated. Some brands/cans don't separate as well as others, so if you're unsure, put an extra can in the fridge just in case you need it. Full fat canned coconut is required (do not substitute with light coconut milk).
- Room temperature ingredients: If you are not using room temperature ingredients (such as non-dairy milk and apple sauce), it could cause the coconut oil to solidify. Bring ingredients to room temperature before adding. If you ended up adding cold ingredients and the coconut oil solidifies, mix the liquids until the coconut oil.
- Gingerbread cut out guide: (1 ½ x 1 ½-inch) square tiles are for roof/windows/steps. (2 x 3-inch) rectangle is for door. (¼ x 3-inch) rectangles are the front wall trim on either side of the door. (¼ x 4½-inch) rectangle is for the trim at the peak of the roof (running from the front to back of house). (¼ x 6½-inch) rectangles are for the diagonal trim pieces on the roof (2 pieces for the front, 2 pieces for the back). To replicate the gingerbread house pictured, use a scalloped pastry wheel for all cuts except the bottom side of the door and trim pieces (use a knife for those instead). Alternatively, use a knife for all cuts. A chopstick or toothpick can be used to poke indents into the trim pieces, if you'd like.
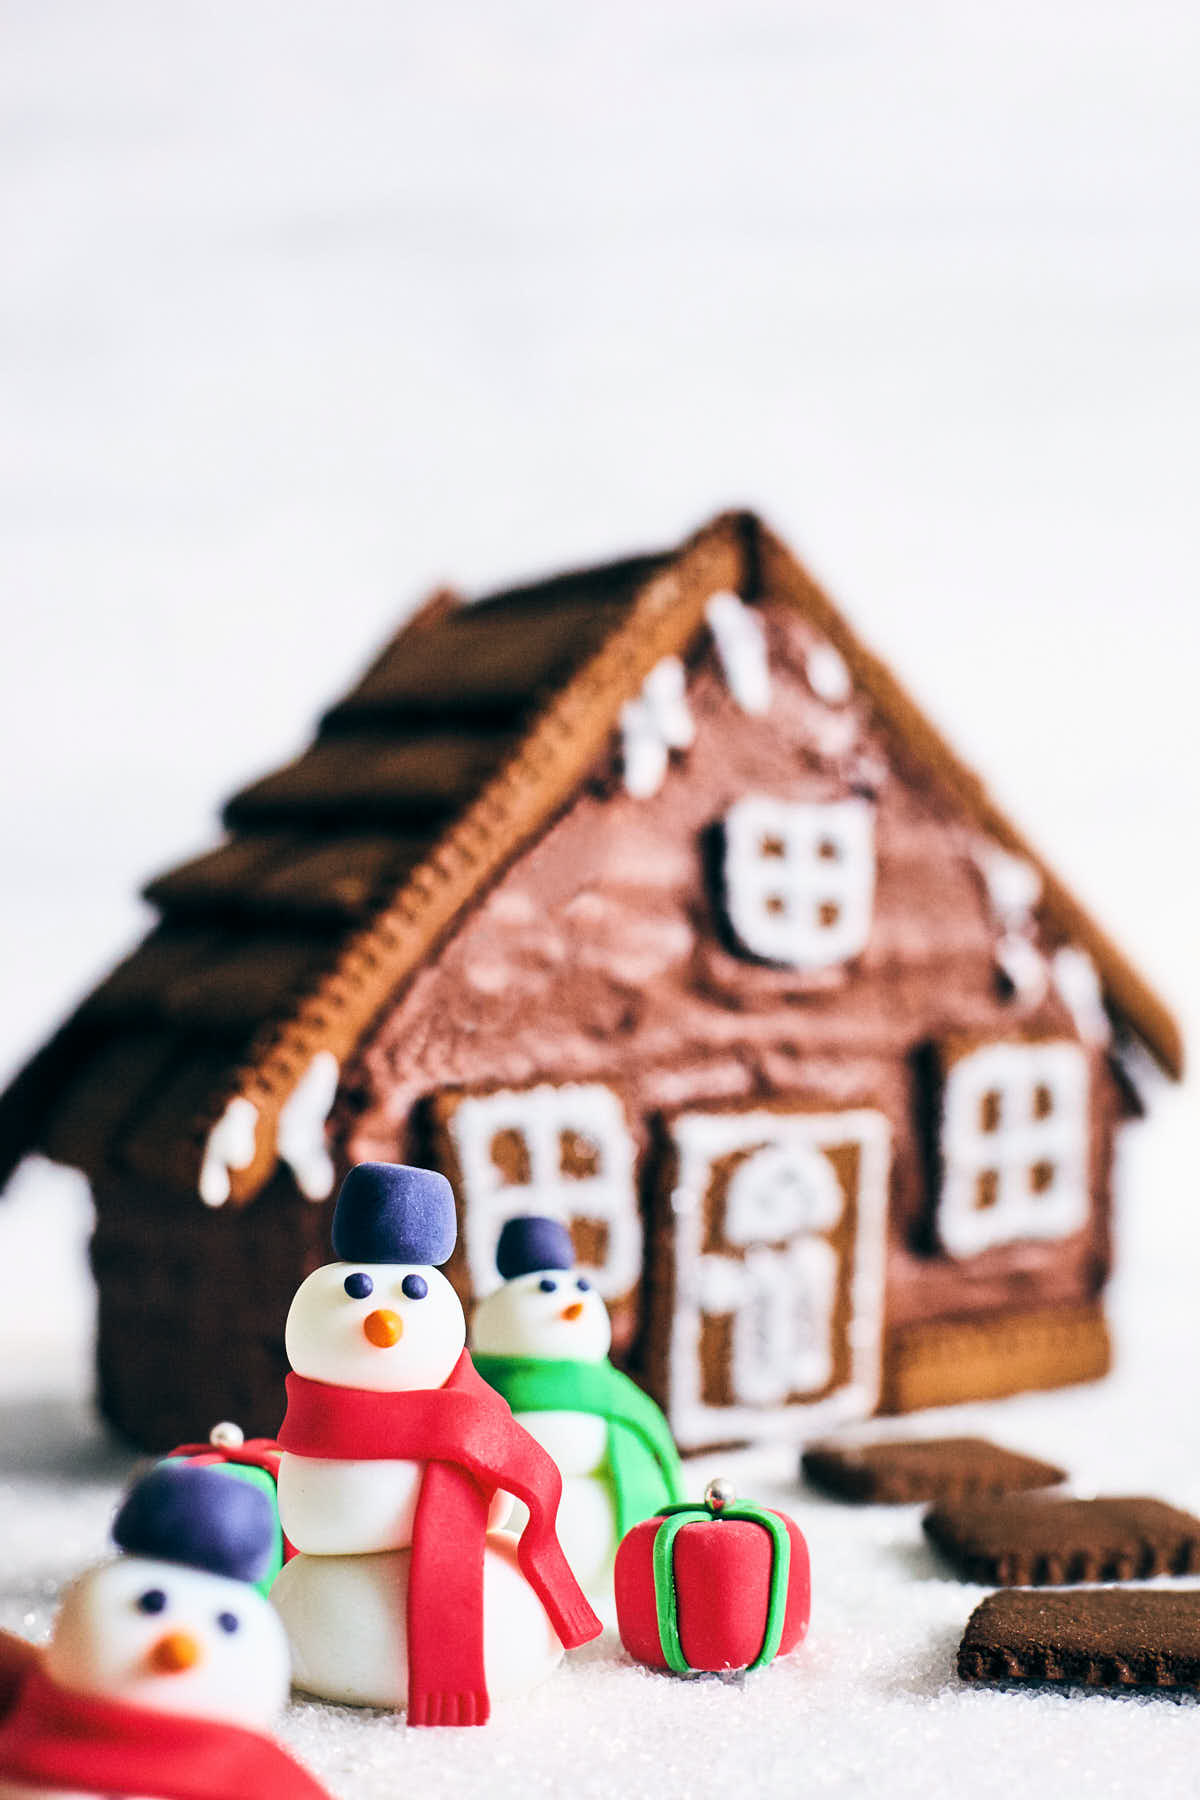
- Other decorating notes: Feel free to get as creative as you'd like. This gingerbread cake house is photographed with extra fondant figures and a bit of icing and sanding sugar.
- Advanced prep: There are a number of components involved so plan accordingly. To split up the prep, you can make the gingerbread cakes and cookies the night before (and the buttercream too, if you'd like). Assembly is best done on the day-of.
- Baking by weight: For the most reliable results, we recommend measuring by weight when baking. Ingredient weights are provided in metric. If you must go by volume (measuring cups), make sure to fluff, spoon, and level the flour to avoid adding too much.
- Nutritional estimate includes full batch of gingerbread cookies. In reality, you will have a bunch of dough leftover after making the cutouts.


LEAVE A COMMENT