Can we all agree that artisan bread is making a comeback? Lately, we've been savoring a dark crusty loaf made of buckwheat, red fife, spelt and whole wheat flour. Toast me up a slice of that, and ready for my eyes to roll back into my head. It's that good. The abundance of quality, artisan bread has prevented me from trying to to recreate such madness at home. Because, frankly, I'd much rather tuck away a handmade loaf from the farmers' market than harvest my own yeast at home (for now, at least).
On the other hand, pita is an entirely different ball game. I don't know about you, but my store-bought options for pita are pretty pathetic. It's near impossible to find a quality whole grain option at the store - one that lacks a long list of unpronounceables. I once even picked up a package where the pita were literally sweating in their printed plastic bags. So not chill, dude. So until the artisan pita industry picks up, I'm making these babies at home. Because unlike fancy French bread, I can almost make pita with my eyes closed.
It takes just a handful of ingredients to make your own pita at home. I choose spelt flour as the base, because I prefer it over whole wheat and since we're making our own, why not. A combination of yeast, honey and warm water gets the mixture going. A bit of salt and olive oil added at the end brings in a light touch of flavor. Perfect for stuffing to your heart's content.
Save this recipe!
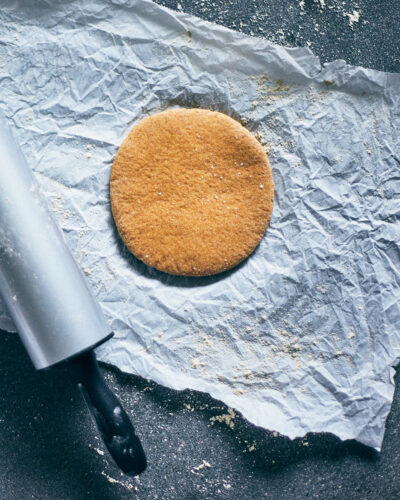
We've made this recipe a bunch of times now and have learned there are a few tricks to getting the perfect puff. Since there's less gluten in whole grain flour (and especially spelt flour), it's normal to get a less extreme puff than white flour counterparts. But the puff is still in your reach! So, now to the tricks. First of all, it's important that you're using fresh and active yeast. The proofing step (i.e. dissolving yeast in warm water and honey) will help you ensure your yeast is alive (they are living creatures after all!). If your mixture foams and doubles in volume, then you know the little guys are still kickin'. And, before you get too excited, know that hot water can kill the yeast, so make sure it’s warm, but not too hot, before adding (ideally around 100–110˚F / 38-43˚C). If you don’t have a kitchen thermometer, test with your finger: the water should feel comfortably warm. Secondly, be diligent about rolling out your dough. Aim to get the dough around ⅛" (0.3 cm) thick, or just slightly over. Exceed ¼" (0.6 cm) and you'll risk your pita not puffing up in the center. Thirdly, make sure get your oven up to a screeching hot temperate (475˚F) and keep your baking sheet in the oven as it preheats. The hot baking sheet helps to create the steam required to quickly puff up your pita. And lastly, when placing your pita on the tray, flip them face down. It'll help your pita bake more evenly since they'll continue rise after you roll them out. It's a weird trick, but I swear it works.
Now get baking! And look out for some pita filling recipes I have up my sleeve. Can't wait to share!
📖 Recipe
Whole Grain Spelt Pita Bread
Ingredients
- 1 teaspoon dry yeast (see note 1)
- 1 teaspoon honey
- ½ to ¾ cup warm water, divided (100 to 110˚F/38 to 43˚C)
- 2½ cups spelt flour (more for dusting)
- ½ teaspoon fine sea salt
- 2 tablespoons extra virgin olive oil (more for greasing)
Instructions
- Dissolve yeast: In a small bowl, combine yeast, honey and ¼ cup of the warm water. Stir with your finger until yeast is dissolved. Set aside for 10 minutes. The mixture should get frothy (see note 1).
- Mix dough: In a large bowl, mix together flour and salt. Pour in the yeast mixture, ¼ cup of the warm water, and olive oil. Mix until the dough starts to come together. If it needs more water, add 1 tablespoon at a time until the dough starts to come together (up to a maximum of ¼ cup).
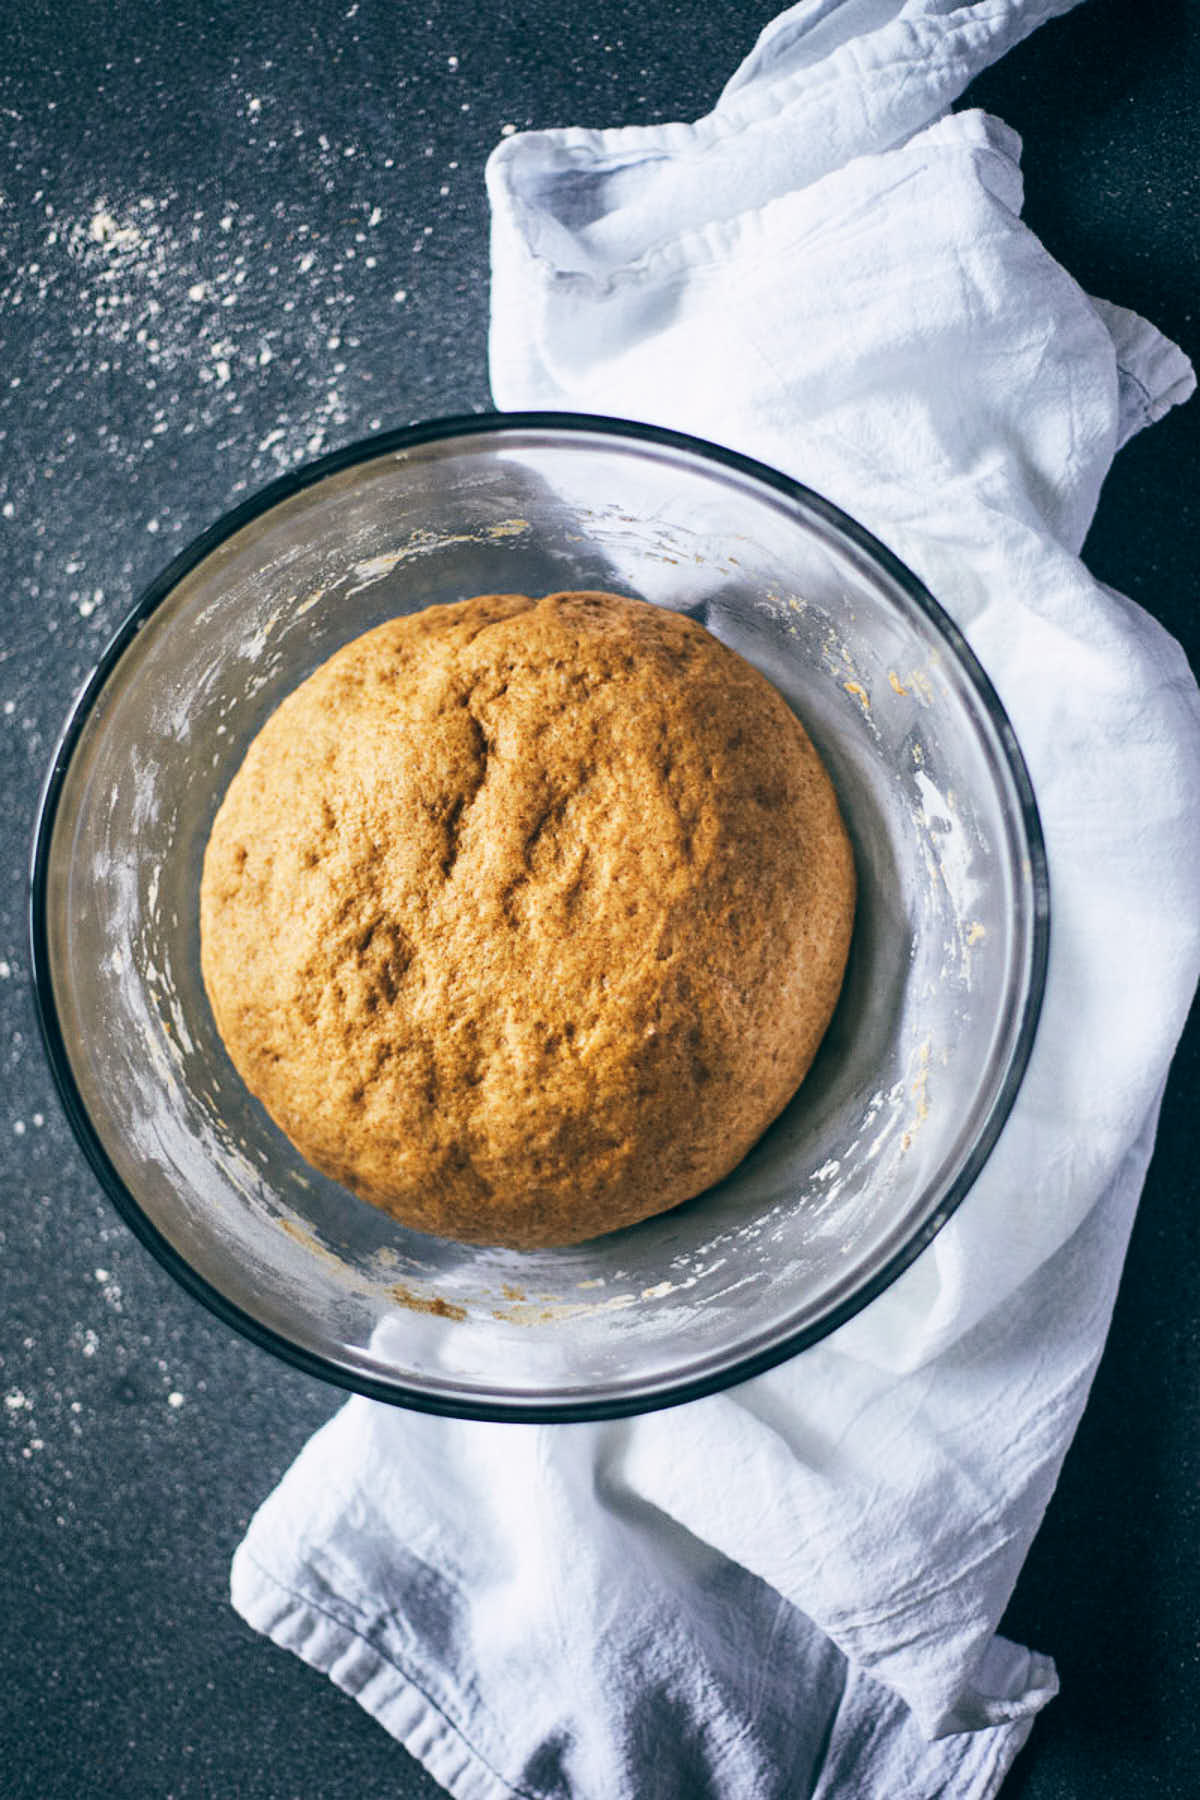
- Knead dough: Knead the dough on a lightly floured surface, for about 10 minutes, until it becomes a smooth ball (dough should spring back when poked with a finger). Lightly oil the large bowl and set the dough inside. Cover and let rise at room temperature until its doubled in size, about 1½ hours (see note 2).
- Preheat: Put the oven rack in the middle of the oven, and place a baking sheet (or pizza stone) on the rack to heat. Preheat oven to 475°F (245°C).
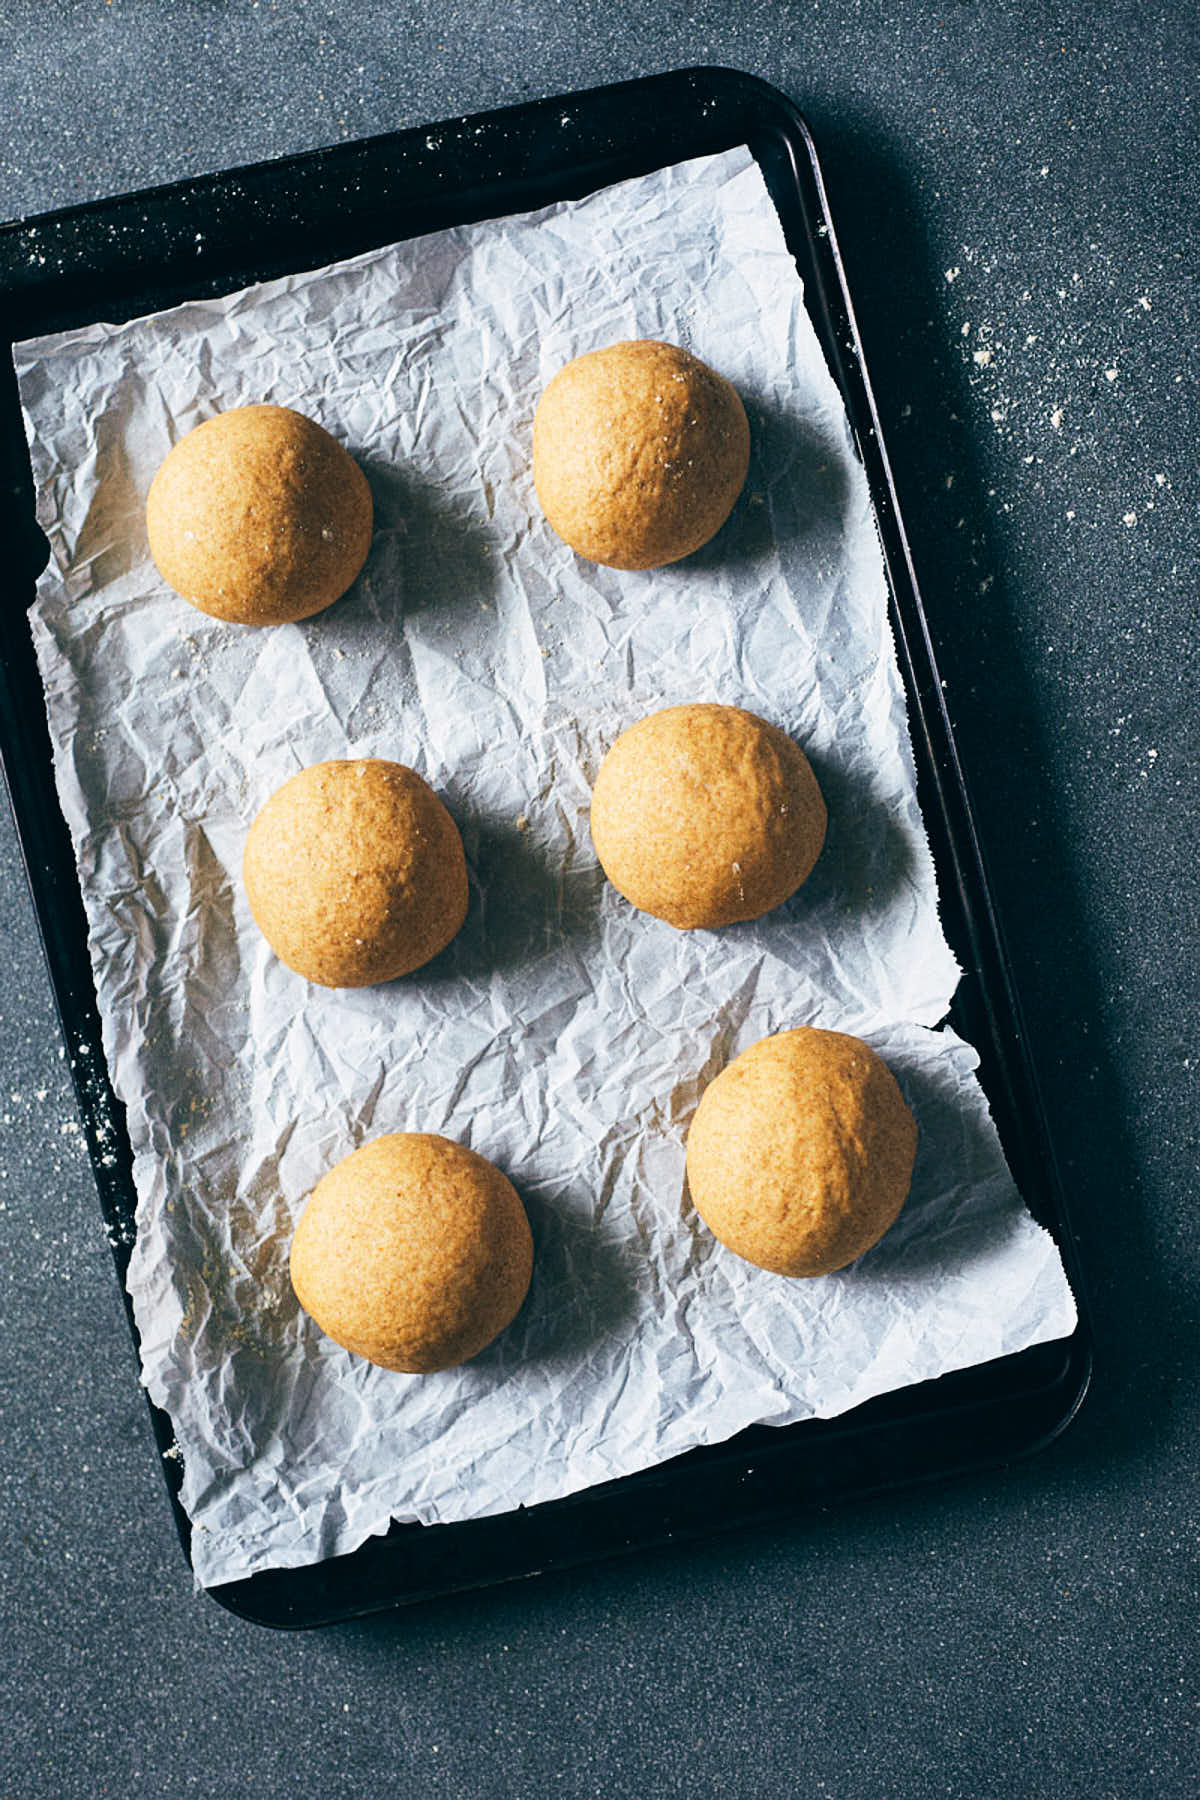
- Shape dough: Punch down dough. Divide dough into 6 even balls. On a lightly floured surface, use a rolling pin to roll dough into 6-inch rounds (⅛- to ¼-inch thick). Let the dough rest for 10 minutes.
- Bake: Remove the hot baking sheet from the oven and quickly flip the pita (upside down) onto it. You'll likely be able to fit 2 to 3 pita on the sheet. Bake until the pita is puffed up in the middle and light browned on the edges, 4 to 5 minutes. Remove pita from the oven. Let the baking sheet reheat for another 5 minutes before repeating with the next batch of pita.
Notes
- Yeast: Make sure your yeast is still active / not expired, by checking the best before date on the package.
- How to know when dough has doubled: I like to take a photo on my phone before it rises, so that it's easier to see when it has "doubled in size".
- Baking by weight: For the most accurate results, measure by weights provided in metric. If baking by volume, make sure to fluff the flour before lightly spooning it into a measuring cut and leveling it off with a spoon.
- Storage tip: Extra pita can be frozen in an freezer bag. Alternatively, store pita in an airtight container or bag (for up to 2 days). There are no preservatives in this pita, so it won't last as long out of the freezer, compared to many store-bought brands.


Marty Wierzba says
Will whole grain Einkorn flour work just as well?
Bri Beaudoin says
Hi Marty! I haven't tested this recipe with Einkorn flour, so unfortunately I can't confirm. If I do ever give it a try with another flour alternative, I'll update the post. Hope you have a great week ahead.
Leeron says
Hi Bri! Tried making your recipe today and it was ALMOST perfect. I just found that one side was MUCH thicker than the other even after placing it face down as you mentioned. The thinner side was so thin that it breaks. Not sure how to proceed exactly... Looking forward to hearing back from you 🙂
farhaana patel says
Hey Bri..i only had 1/4 cup of spelt flour so substituted the rest with wholewheat, i was kinda nervous that they wouldn't puff up but they came out perfectly!! Will definitely be making this again instead of buying from the store 🙂
Rami says
Hi, how many grams of whole wheat spelt flour? Where to place the pizza stone? What oven mode I should choose? Do I need to heat the baking sheet if the stone is hot?
Bri says
Hi Rami,
The weight for the flour (in grams) is in the post, but if I'm misunderstanding your question, please let me know! If you have a pizza stone you can use it instead of a baking sheet. Whichever you use, they should be hot in the oven. Placed in the center of the oven is best, just make sure you leave enough space for them to puff up slightly. If any other questions, don't hesitate to reach out!
Rami Daoud says
Thanks for the reply. Does 3/4 cup water equal 177mL?
If I sifted the spelt flour and added 1 1/4 tbsp Vital wheat gluten to each 1 Cup of spelt flour would that make it puff better?
Bri says
Hi Rami - Yes, 3/4 cups is equal to 177mL. I haven't tested this recipe with any other variants than what's outlined in the post, so unfortunately can't comment on how your changes will impact the final product. Baking is often quite a science, so increasing the gluten content may or may not have your intended result. Usually I'd recommend making the recipe once as is, and then after you're familiar with how it's supposed to be, then experiment with your own personal tweaks. Regardless of what you choose, hope you have fun with it!